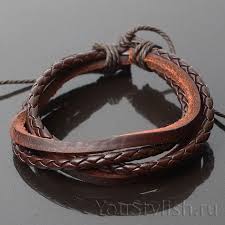
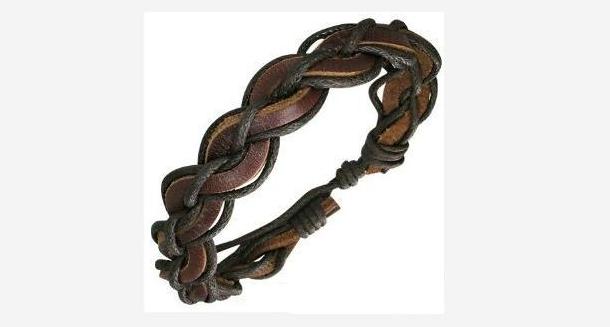
DIY leather bracelet for beginners. DIY leather wrist bracelets for men and women Stylish DIY leather bracelets
We will need:
- About 2 meters of leather cord (2 mm) (the length depends on how many times you want to wrap the bracelet around your wrist. 2 meters of lace will allow you to make about 4 turns of the bracelet),
- 1.5 meters of leather cord (1 mm),
- 6 meters of leather cord (1 mm),
- About 140 small beads with a hole large enough to thread a narrower (1mm) leather cord through,
- a beautiful button (optional).
Of course, you can use leather laces of other diameters, the main thing is that they can be threaded into beads.
So let's get started! The bracelet on the right (photo above) does not have a button and will be fastened with a loop at one end and a knot at the other.
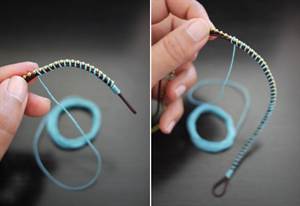
First, take a 2 meter long cord and fold it in half.
Now we take a cord 1.5 meters long and tie it in a knot around the loop as shown in picture 1.
Then we lean the short end of the lace (on the left in the picture) against the center, and tightly wrap the long end around the base of the bracelet in order to make a beautiful beginning.
It is very important to work carefully as the laces are very thin and can break. You can first practice strength on some other lace.
Now tie a knot as shown in picture 2.
Then we put all the beads on the long end of the cord (the one with a diameter of 1 mm) and tie a knot at the end so that the beads do not move out while working.
As for the short tip (the same cord with a diameter of 1 mm), it can be cut off or inserted into the first bead if the hole size allows.
So, let's move our first bead up.
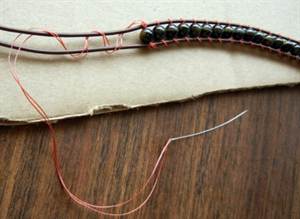
Now we take a 6-meter cord and cut it into 2 identical parts (DO NOT CUT). For example, they can be wound into balls, as shown in picture 1 on the left.
We tie a knot (from a 6-meter cord) directly under the first bead.
Well, now you need to carefully follow the steps shown in pictures 4 to 14
At first there is a chance of doing something wrong, but don’t worry, you need to carefully undo what you’ve done and start again with the second bead. Or maybe everything will work out right away.
It is very important to alternate weaving “above” and on the next bead “under” the thin cord in the middle (which has beads). It is necessary to maintain alternation in order to secure the beads well and beautifully between two thicker cords (2 mm wide).
Well, do you see the alternation?
You can easily get the hang of it because this process looks more complicated than it actually is!
Don’t forget to periodically wrap the bracelet around your wrist to see its length.
To finish, place 1 end of the braided lace in the center (for example, the left one), and wrap the other end around all the other laces. Then we make a knot as at the beginning of the bracelet, shown in picture 4.
Now we take all the ends and tie them into a large knot. Pull it tight. Depending on the length you need, you can skip a little space and tie another knot and another, as shown in the last picture.
If you are using a button on the other end of the bracelet, the distance between the two knots will be the button loop.
OK it's all over Now! Your hand-woven leather bracelet is ready!
http://bellezza4u.ru/accessuari/item/61-kojanii_braslet_svoimi_rykami.html
It's time again to stretch our hands a little, exercise our imagination, tap into the creative spark within us and make something with our own hands. And not even something, but trendy leather bracelets. What's great about these bracelets is that you can wear them with anything, especially ethnic clothing. In addition, there are a huge variety of different shapes, colors and options, so you can always choose a leather bracelet to match your outfit. Well, it’s not even worth describing how good they look on the hand.
So, let's get down to the actual process of creating bracelets.
DIY wide leather bracelets
You will need:
. Leather straps (strips of leather with a clasp at the end)
. Ribbons
. Metal spikes
. Threads
. Super glue
You can simply glue a narrower piece of tape onto the bracelet and add some spikes.
Or you can attach spikes and entangle them with a bright thread (yellow, for example). You will get 2 wonderful bracelets.
A couple more options for the creative process “How to make leather bracelets”
You will need:
- leather laces - you can use thin leather ribbons
- floss threads
- glue
- scissors
- scotch
- needle
Step 1
Measure your wrist by wrapping the leather cord loosely around your wrist twice, then add an extra 10cm to tie it. Glue one end of the leather cord to the surface so that it does not move and, stepping back about 5 cm from the edge, drop a drop of glue onto the leather cord and attach your first color of floss to it.
Step 2
Continue winding the floss around the leather cord until you have a strip of the width you want, then cut off the rest of the thread, securing the end to the bracelet.
Step 3
Take a different color of thread and do the same procedure with it again. Continue doing steps 2 and 3 until you have done about 5cm of different colors.
Step 4
When you're done wrapping, take the needle and pass it under yours. If you want, you can add a small drop of glue to make sure your floss doesn't come off.
Step 5
Tie the end of the lace that is closest to the wrap around the other end of the lace. Make a simple knot. The knot should be strong, but the leather lace should pass freely back and forth and slide through it.
Advice: Before tying a leather lace, wet it a little and remember it to make it softer and easier to tie. This will also help make a strong knot.
Step 6
Leaving at least 10 cm on the other side, repeat steps 1, 2, 3, and 4 again.
Step 7
When you have finished wrapping the other side of your bracelet, re-tie the loose end on the other side.
You will get wonderful multi-colored bracelets.
Well, now more complex options:
You will need everything you have on hand: leather laces and strips, beads, chains, glue, threads.
1. Bracelet with beads. Take 2 laces, place beads between them and attach the beads to the laces by passing threads through them and entangling the laces with these threads. In the photo: the first from the wrist.
2. Multi-strand bracelet with beads. Just grab some suede threads, a couple of end clasps, and seed beads that have holes for your threads to fit through. String your beads and beads onto strings, tying the thread after each with a knot. Secure the fasteners at the ends.
3. Braided bracelet with beads. This is also an easy way. Just start braiding your hair with suede threads, adding beads here and there, secure the clasps at the ends, and you're done. This woven bracelet can also be made with a chain. Just add a thin chain instead of one of the threads and start braiding.
Don't stop your imagination. You can make your own options and variations. The main thing is that you don’t have to buy such wonderful bracelets in the store.
DIY leather bracelets (video)
Paper is an ideal material for creativity. You can draw on it, make appliqués, and use it to create all kinds of crafts.
Paper bracelets
Jewelry will be no exception. Yes, using just paper, you can easily make a bracelet, necklace, tiara or the whole set at once.
In the 60s, paper decorations were very popular. They were made at home on their own. Below we will look at several examples of how to make a bracelet out of paper.
Different ways
There are many ways to make a paper bracelet.
Idea number 1.
Prepare the following materials:
- thick multi-colored A4 paper;
- fishing line;
- glue;
- Ruler and pencil;
- a thin plastic or wooden stick (as for sushi).
You can start working.
Ready. A simple way to make a paper bracelet with your own hands.
Idea number 2.
Using this method, even a five-year-old child can make a bracelet for himself. Although for the first time it is better to do it with him.
You will need:
- three multi-colored thick sheets of paper;
- scissors;
- glue.
It is necessary to cut three multi-colored strips of the same length. Now carefully braid them into a braid. In this case, it is advisable to glue the strips with each bend. But use a little glue so that the paper doesn't get wet.

This was the second way to make a paper bracelet. As you can see, it turns out to be a very simple but beautiful bracelet.
Idea number 3.

Egyptus Bracelet
You can also make an Egyptian bracelet from the cartoon of the same name.
To do this you will need thick but flexible golden paper, glue, 3 large blue beads, 1 blue bead, and a blue felt-tip pen.
- Cut a sheet of paper crosswise, attach it to your wrist and glue the ends together, cut off the unnecessary part.
- Using a felt-tip pen, draw the eye of Horus.
- Glue a blue bead in the center of the eye, blue beads on the bottom and sides.
The fabulous decoration is ready. Now you know how to make an Egyptus bracelet out of paper. This will be very relevant for little fans of the cartoon or for those interested in Egyptian themes.
Positive aspects of creativity
These are the easiest ways to make paper decorations. Show them to your child and he will be delighted. Girls will especially enjoy this process. After all, in the same way they can make additions to the bracelet - beads or a necklace.
As for boys, the same Egyptian bracelet will suit them perfectly and will give them the opportunity to imagine themselves as the last pharaoh of Egypt.
This will perfectly develop their spatial thinking and creative skills. Weaving bracelets will help little children develop fine motor skills and finger dexterity.
You can also experiment with design and translate all your ideas into creativity. The main thing is not to be afraid to fantasize.
The accessory market offers us a large selection of style elements, but how to make a leather bracelet with your own hands? Both leather and its substitutes occupy a large place in modern material selection. It does not require processing difficulties and effectively complements the image. Leather is used in bracelets for both men and women.
Bracelets Styles
We offer you to consider several examples of bracelets and instructions for their manufacture.
Leather thin strips and waxed leather cords are sold in stores by the meter. Take the required amount and choose colors. Cut the strips into pieces and secure with cords. Collect different types of cords into one bracelet. Add metal embellishments or beads.
Take a long cord so that it circles your hand several times and secure special fasteners at the ends.
Note! The caps can be glued using super glue or hot glue from a hot glue gun.
Braid several blanks of metal bracelets with a leather cord like a wicker basket. The scheme of work is very simple, the master class will not take much time.


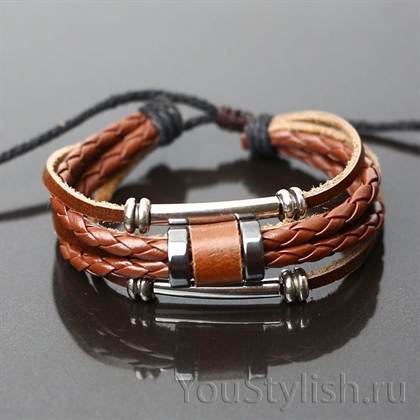
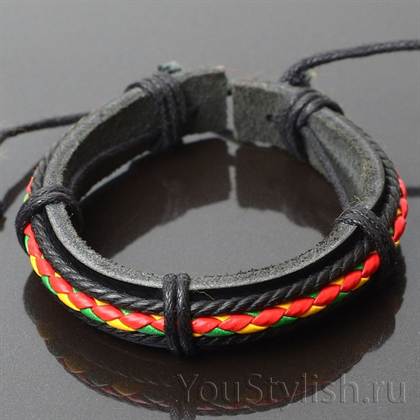
The simplest type of woven leather bracelets is the “pigtail” method. You can weave different types of laces and strips. Regular brown and black colors suit various clothing styles; more colorful ones are chosen for bright summer looks.


An interesting version of weaving with leather cord and beads has recently become fashionable. For such bracelets, the way of imagination is open in terms of combining the colors of threads and beads.
Delicate cute lacings intertwined with beaded thread are tied with dense bright denim threads.

Take beads from 4-6 mm and intertwine them with threads between two leather cords. To help with this you will need a needle.


Wide model
A more complex, but still affordable way to create your own individual accessory is to make a wide bracelet like a strap or wristband.
Fasteners can be buckles or buttons. Spikes and rivets are glued or attached to a thick piece of leather, and holes are made through which cords can be threaded for decoration.


We find suitable material in the form of pieces from an old jacket, bags or boots. The buckle clasps can also be taken from the straps of old bags, the buttons are purchased new.
Thick leather is enough to secure with buttons, press out the design, paint it with paints, paste it with half beads, and embroider it with threads.


Thin leather and suede are glued onto steel or plastic blanks for bracelets. They are sold in hardware stores and can come in various widths and sizes.
Most often, needlewomen use this material for bead embroidery. It is not necessary to make bracelets from solid fabric; small pieces of leather can also serve as material for creating jewelry. Attach geometric shapes or cut-out leaves using leather glue. A leather flower, attached with a button on a strip, becomes a glamorous detail in your appearance.

Men's options
Common associations of a men's bracelet as rock attributes or an addition to the impressive image of bikers. However, it is still relevant to add fittings, metal inserts with engraving of a name, club or ornament, spikes and rivets to such accessories. But in contrast to the informal movement, leather bracelets entered the style of the urban man. Many stars wear such jewelry, and they look no less masculine.


Some types of bracelets become purely men's work. It is difficult for a girl’s delicate hand to cut out any detail from thick calfskin. But such bracelets will look very impressive with some folk ornaments, which is very fashionable now. Although the task is simplified if it is possible to glue the embroidery on top of the leather, and the material itself will act as a strong base.
Making bracelets this is a very interesting and creative activity. You don’t always need a master class for this; sometimes a photograph is enough for an idea to pop into your head. Today I offer a selection of various models from the Internet with a short accompanying description. The models are very simple, but each idea has a useful thought. Moreover, many people really liked the last review, let’s continue the topic.
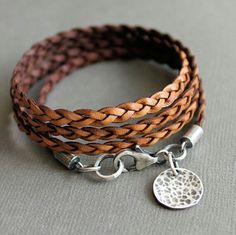
Often these bracelets use charms and connectors. The proposed version uses a flat natural leather cord and a ring connector. A button fastener with the help of connecting rings measuring approximately 4-5 mm is attached to the end for ribbons and cords:
Depending on what accessories are used for the bracelets, the style and mood of the jewelry completely changes. A few more options for example, made according to the same scheme. Waxed cord is used here, but with leather laces this bracelet will be more durable. 
If the hole is too small, you can use end caps. It is better not to use connecting rings in such a place; when tensioned, they can unbend. Or take the strongest ones, small in diameter and 1-1.2 mm thick.

In our store there are a lot of connectors suitable for such bracelets: birds, fish, twigs, lizards of different colors, flowers, eyes, lips, etc.

For a large item or button, you can simply thread the cord through the holes:

In this version, the top connector is also not fixed:

For the summer, you can make a bracelet with an anchor pendant. In order not to search for a long time, I selected several pendants for example: number one, number two, number three, but in general we have a lot of them)))


A few more options for leather bracelets and laces:
Fun solution:

This is how easy it is to make a lot of bright bracelets for the summer! Have a good preparation for the hot season!
Leather bracelets are a fairly universal accessory that has not gone out of fashion for many seasons and does not lose its popularity. It has countless varieties and shapes: flat and voluminous, wicker, with various accessories, with spikes. Leather bracelets symbolize the spirit of freedom and the rejection of all rules, because they are made with your own hands.
We sew leather bracelets with our own hands step by step in the master class
Experienced craftsmen and craftswomen know that when creating bracelets it is very important to choose the right leather material. For each of the patterns for weaving bracelets with your own hands, you need to select the appropriate type of leather material.
So, to create thick, large leather bracelets, it would be correct to give preference to a rough type of leather: saddle or crust. To create men's bracelets, saddle leather is most often used.

For the manufacture of thin, elegant woven leather accessories for women, leatherette is most suitable. This material is softer in texture and is easy to process with needles and hole punches.
Since elegant leather bracelets have become very popular, we offer several detailed descriptions of the manufacturing processes of this accessory.

Let's try to create a leather bracelet decorated with beads. To begin, prepare all the materials necessary for work:
- Several pieces of leather cord that will have a length equal to the circumference of your wrist and plus a small margin for forming knots;
- Clip or clothespin;
- Beads for decoration;
- Clasp for your bracelet.
Take your cut laces and secure one side with a clothespin or clamp. Now start stringing decorative beads onto one of the threads. Don't forget to secure them on both sides with knots. Repeat the above steps with all of your laces.
After you complete these manipulations, secure the free ends of the leather threads using the bracelet clasp. Your leather bracelet is now ready to use.
We create leather bracelets for men quickly and easily: the manufacturing process
Men's leather bracelets are distinguished by their simplicity and laconicism compared to women's ones.

We invite you to learn how to weave a simple men's leather bracelet. To work, you will need a piece of leather five centimeters wide and about twenty centimeters long.
Start making the bracelet:
- Form the pattern of the product on the back of the leather. The length of the bracelet must be at least nineteen centimeters. Make two slits in the middle, not reaching the edges by 1.5-2 centimeters.
- Place the workpiece vertically and, using a washable pencil, number the cords from one to three. Bring the bottom edge of the bracelet between the second and third cords.
- Straighten the leather laces as you weave along. Continue weaving in the following order: the first cord with the second, the third with the first, the second with the third.
- Bring the bottom of the workpiece forward between the third and second laces.
- Place the cords again so that the lines go down to the bottom of the weave in the correct order - first, second, third cord.
- Repeat steps two through four. You should end up with a braided look. Give the desired shape to the edges of the bracelet and use an awl to make holes.
- To make the fastener, glue several pieces of leather together and leave to dry for a day. After drying, round the edges, make a hole in the middle and smooth out any rough edges with sandpaper.
- Thread a thin leather cord through the holes in the bracelet. Pull both edges through the resulting leather nut. Tie the edges of the lace with knots.

This accessory will be a wonderful gift for your man and will be a pleasant and bright addition to his image.
Children love to imitate adults by decorating themselves and wearing their parents' clothes. You can please a little fashionista or fashionista and weave leather bracelets for them with your own hands, which will attract the child with a bright design. Such bracelets can compete in popularity even with well-known bracelets made from rubber bands.
For children's bracelets, it is best to use leather laces in bright and rich colors. Kids will be happy to wear such fun accessories to school and kindergarten.
Video on the topic of the article
At the end of our article about making leather bracelets for women, men and children, we offer you a selection of thematic videos. We hope that it will help you explore the topic we have described in even more depth. Enjoy watching!


 Activities with young children for Cosmonautics Day")