Unique colorful patchwork bedspreads. Patchwork sewing. Yakut patchwork made of cloth and drape. Master class Choosing the right fabric
With its diagrams, templates and patterns - this is real art. After all, creating something from the smallest pieces of fabric is akin to the work of an artist who creates another masterpiece. Patchwork, which is another name for patchwork, has been used by wasteful housewives for a long time, because you can create a new blanket or pillow using this needlework technique from the smallest and seemingly unnecessary scraps and remnants of fabric.
History of the emergence of handicraft techniques
It is quite difficult to trace the origins of this skill. It is known that references to patchwork have been around since the Middle Ages. There are examples of such creations in Europe, India, and the Far East. At the moment they are kept in museums.
Fact! There is an exhibit in the Bulaq Museum in Cairo that confirms that patchwork was practiced as early as the 9th century BC.
Many people associate Slavic women with the patchwork technique, because many grandmothers and mothers have other household items made using this technique. In fact, patchwork came from Africa and Asia. Europe learned about patchwork during the Crusades. It gained particular popularity among the British.
Residents of America felt a real boom in terms of this type of needlework in the 18th century. It was popularized by Europeans. This distribution was dictated by the needs for clothing, and since whole linens were expensive, it was made from small waste scraps.
Around the same time, patchwork came to us, but at first it was actively used among the Old Believers. It entered wider areas in the 19th century and was considered an original peasant occupation. In 1917, patchwork became a decorative and applied art.
Fact! Patchwork gained particular popularity a couple of decades ago.
Types and techniques
- Knitted. Here the fragments are sewn to each other using a crochet hook. It is this patchwork technique that is embodied in.
- . He combined Eastern and Western motifs. Stitches are used here and the fabric is silk. In addition to practical bedspreads or clothing, this type of sewing is often used in decorative panels. The composition is based on geometric shapes - rhombus, triangle, corner, square.
Technique
The technique of sewing patches together is elementary at first glance - cut and sew, but this is one of the most common misconceptions of beginners. Creating patterns from identical scraps or creating complete “pictures” from completely different particles is achieved through the use of different techniques, namely:
- Quick square. This technique is convenient and easy to learn for beginners. Products in this technique are exclusively square or rectangular.
Note! Using this technique, you can create a bedspread in a matter of hours.
- Watercolor. A popular technique, it can also use squares that are sewn into blocks and formed into a canvas. The main feature is the shreds.
- Stripe to stripe. Here, as the name implies, strips of fabric of different colors and even textures are used. You can combine the stripes however you like. From such strips you can create a unique palette and even patterns. For example, classic, Christmas trees, wells.
- Izba from. It involves the formation of a pattern of stripes around the central element - a square. They are arranged in a spiral. There are variations of this technique - shifting the square into the corner.
Advice! To create a clear pattern, you should collect patterns from stripes of the same color in pairs.
- Magic triangle. This is the most common pattern in patchwork; in particular, such patterns, patterns and templates are used for potholders, bedspreads. In addition to the magical power of this figure, which many people believe in, the triangle is also easy to use. With it you can create a variety of shapes, including complex stars and simple squares. When using this technique, interesting combinations can be achieved.
- Corners. This is originally our invention. The main difference is that the corners are not made from cut-out blanks, but are formed from pieces of fabric of different shapes. The resulting strips are sewn into fabrics. The result is a voluminous canvas.
- Chess. The main element here is small squares or diamonds. They are arranged in a checkerboard pattern of contrasting colors.
- Russian square. The central part of the canvas is assembled from squares, and the perimeter is sheathed with isosceles triangles. There is also alternating sewing - squares, triangles, stripes.
- Honeycomb or grandma's garden. The basis of the canvas is formed by hexagonal blanks.
Fabrics
In fact, you can use absolutely any fabric, scraps and pieces of materials in patchwork. But many craftswomen claim that it is easiest to work with cotton fabric; a striking and inexpensive example is chintz.
Important! Before you start working with chintz, you need to wash it and let it dry, as the material tends to shrink.
An interesting process of work and the result obtained with drape. The fabric is soft, often in warm colors. Goes great with tapestry and embroidery. Organza is also popular, especially when layered with a different color fabric to create an unexpected and original motif.
Different shades of jeans also go well together, and a blanket, pillow, or potholder made from such scraps looks great.
The most difficult thing, but possible, is to create products from silk, staples and modern artificial materials. But the result is worth it.
Advice! For beginners, the best material will undoubtedly be chintz. It is easy to sew, iron, cut. A colorful pattern on fabrics will hide a certain ineptitude, which will definitely be present at first.
Tips for storing materials:
- Sort fabrics by type - cotton, silk, wool.
- Single-species within a common compartment by color.
- A separate group should include colorful fabrics with flowers, ornaments and other prints.
- In separate containers by color, small shreds that can be used for panel And .
Color selection
It is important to achieve harmony in the finished product. It's not that easy if you don't have experience.
Advice! The first patchwork products, patterns, patterns and templates that you will find with us should start from small items, for example, oven mitts or pot holders.
First, imagine what color scheme you would like to see the finished product in. If you need to fit it into the existing interior, then you should select colors from those that are already present in it, then you will be able to create a harmonious picture.
The selection of shades and colors also depends on the purpose of the product. For example, a blanket for a baby should be made in calm pastel shades. If the child is older, then brightness and contrast are welcome.
Patchwork patterns, templates and patterns (minimum set of tools)
Of course, you can get by with an ordinary needle, pieces of fabric and thread. But in order for needlework to truly bring pleasure and results, you should acquire the following tools:
- Sewing machine. It will not only make it easier, but also speed up the process of creating things. Of course, you can also sew by hand, but making the required allowance of 0.6 mm will be very difficult.
- Textile.
- Knife, mat and ruler. And not simple ones, but specifically for patchwork. They facilitate and significantly speed up the process of cutting blanks. The mats are often self-healing, and the blades in the knives are replaceable. What’s interesting is that the knife is also atypical; it is roller and is intended specifically for use in patchwork.
- Ironing board and iron. These attributes can be used to create clean lines and neat products. In essence, patchwork is 3 operations - cut, sew, smooth.
- Design wall. It is created from white flannel. This material is the best. After all, other fabrics stick to it without any problems. It is best to hang it on the wall, first framing it in a rigid frame. Size at least 1.5 by 2 meters. With this simple device you can create like an artist on canvas.
- Pins and pincushion.
- Scissors, thread.
The tradition of finding a use for every piece of fabric dates back to the days when clothes and interior items were sewn independently. Everything in the house was made and decorated by hand. Nowadays, the patchwork technique is experiencing a new surge in popularity, but as an opportunity to make a unique thing for the home that expresses the taste and talents of beginners and experienced craftswomen. A bright spot in the interior, a good gift for new residents or a young family, can be bedspreads, rugs, or a do-it-yourself patchwork quilt, created without much hassle or expense.
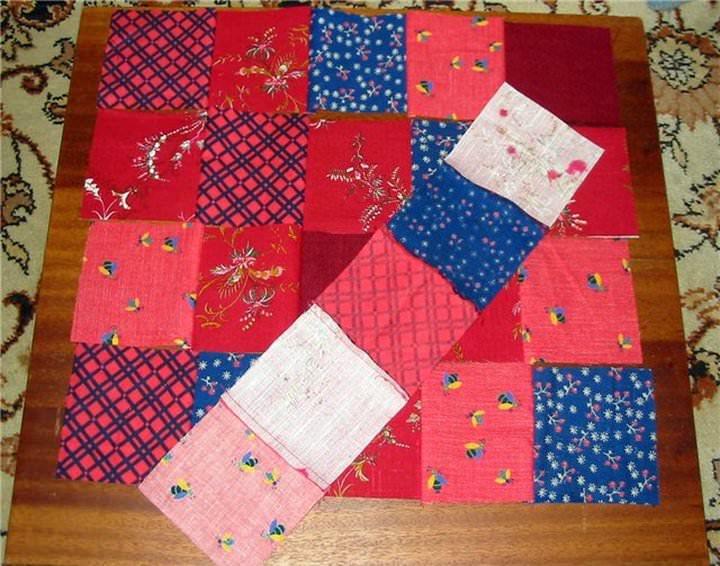
Sewing and assembling a patchwork quilt or bedspread begins with preparing the workspace, because a huge number of patches requires a significant amount of space, for example, a large table. When choosing fabrics, first of all, select the material for the front side. Experienced craftsmen combine silk and chintz, linen and satin, satin and drape in one product. For beginning needlewomen, it is better to sew bedspreads, rugs or patchwork blankets with your own hands from chintz, satin, linen, calico, and knitwear.

You can purchase ready-made sets of fabrics for patchwork, which are offered at the crafts fair, but for beginning needlewomen it is more interesting to audit the closets, selecting unnecessary items and leftover fabrics.
An original blanket can be made from scraps and cut-out denim items. Before you start sewing, you need to prepare the fabric - cut out thick seams (on old clothes), worn out areas, wash, iron, make patterns.

Even if everything that comes to hand is used, you need to think through color combinations and the overall composition of the blanket. It is advisable to depict your ideas on sketches - checkered sheets, colored with pencils. For beginning needlewomen, this technique is convenient: take as a basis one fragment assembled from several parts, and then duplicate it several times. When choosing color combinations, it is important to take into account the color of curtains and tablecloths so that the new textiles harmoniously complement the interior. To sew the lining and border, a plain, durable fabric is usually used.
In addition to the lining and top, the structure of the patchwork quilt must contain insulation - batting, padding polyester, holofiber. The filling can be natural (cotton, wool, wool mixture) or synthetic. The most popular is padding polyester - light, warm and moderately voluminous. To sew a blanket, choose a fabric with a density of 150-200.

For beginning craftswomen, as an economical option, the master class suggests using an old blanket as insulation, if it is not too heavy. Otherwise, assembly and sewing are similar.
To sew bedspreads, blankets or a patchwork quilt, as in the photo, you need to prepare:
- High quality threads No. 45 or No. 50. The color is chosen to match or contrast. You will also need simple threads for basting.
- Sample made of thick cardboard or plastic. The shape - round, square, hexagonal, diamond, striped - is chosen in accordance with the design. For beginners, the easiest way to sew your first blanket is from squares using patterns. The size of the part depends on the overall size of the product and is 5 – 10 cm + 1 cm for seams. For example, for a blanket made of 8 x 8 cm squares, you need to add an allowance of 1 cm on each side and draw a frame 1 cm wide. The total size of such a template will be 10x10 cm.
- Tools– in addition to an iron and a sewing machine, you need needles, pins, chalk or soap, scissors and a measuring tape.
Sewing technique “strip to stripe” (video)
How to sew a patchwork quilt correctly
Having sorted the flaps, you need to make patterns using a template. It turns out to be many identical squares with a seam line marked inside. For example, you can take a baby blanket 110x140cm. Taking into account the border, you need to make 192 squares measuring 8x8cm.

A convenient technique for assembling a bedspread is to first sew the square blanks into long strips, and then connect these rectangles together. If the pattern is in the form of triangles, they are sewn together in pairs in the shape of rhombuses or squares; further assembly is similar to the first option.
To ensure that the seams are accurate, neat, and without distortions, before sewing, the flaps must be ironed along the contour of the intended seam.
We fold two squares with the wrong side up, pin them together and stitch them together. All seams must be ironed from the inside out, placing them in different directions so that there are no thickenings.
When the most labor-intensive part of the work is completed - assembling the top, you can assemble blankets, rugs, bedspreads using the diagrams. On a flat and hard base, lay out the ironed lining with the wrong side up. To secure it, you can secure it to the table (or floor) with tape.
The filler is laid out and leveled on top so that the lining protrudes from the layer and the top part by 5 cm.

Now the blankets, rugs or bedspreads need to be quilted correctly. The machine quilting technique involves starting from the center, stitching the squares diagonally to the edge (see diagrams in the photo). To do this, you need to install a special embroidery foot on the machine. In addition to the usual stitch, you can also choose a curly outline - a sun, hearts, etc. The top thread is selected to match the tone of the flaps, the bottom thread is tucked in to match the lining. We sew with low thread tension. After finishing the work, you need to trim the edges of the blanket. If the stitching is done by hand, the edge of the blanket is processed first.

Assembly technique:
- Sew all layers of the blanket and the border on the long sides;
- Everything is also stitched from the short sides;
- You need to use a hidden seam to finish the corners of the blanket, hiding the extra pieces.
If there was no machine stitching, hand stitching is done after edging. To do this, you need to take strong threads and stitch along the perimeter of the parts with a seam of 3-5 mm or at the joints of 4 squares, pointwise.
Patchwork quilt using the “ladder” technique (video)
Sewing a patchwork quilt: master class
The master class “How to sew a patchwork quilt with your own hands,” which is offered by the crafts fair, is suitable for both beginning needlewomen (with a step-by-step description) and experienced craftswomen who can quickly navigate the instructions and save time. The finished size of the product is 1.2 x 1.3 m. The technique is also used for sewing bedspreads, only instead of the “charm pack” patchwork set, you need to take a “layer cake”, cutting parts measuring 11.2 x 12.5 cm. blankets or rugs with stitches of about half a centimeter. This master class uses fabric 112 cm wide.
Tools and materials:
- 80 patches 12.5 x 12.5 cm or 2 sets of “charm packs”.
- Plain fabric in two shades (light and dark) – 120 cm.
- The border of a suitable color is 45 cm.
- Textile for lining – 1.3 x 1.4 m.
- Sintepon – 1.4 x 1.3 m.
- Iron and sewing machine.
- Cutting mat, circular knife and measuring tape.
- Sewing accessories.

Step-by-step instruction:
- Cutting technique. From light plain fabric you need to cut 9 strips 6.25 cm in width and 80 pieces measuring 6.25 x 11.25 cm. From dark fabric - the same number of the same blanks. (The “charm pack” set – 160 pieces of the same size.) Prepare patterns from the fabric prepared for the border – 5 strips 5.6 cm in width. See diagrams.
- Preparation of parts. Place scraps of printed fabric and plain fabric together and stitch along the long side. Prepare 160 rectangles in a similar way. Press the seams, folding the seams towards the printed fabric.
- Top assembly technique. Lay out the rectangles so that the monochromatic halves lie in steps (right-left, etc. - like the diagrams in the photo). Assembly: alternating 2 fragments with a light border and 2 with a dark border, you need to form a row of 12 blocks.
- In the next row We sew the first block, laying it so that the plain fabric is perpendicular (either on the side or on top). For the next block, the border should be chosen in a contrasting color.
- Ironing. If you lay out all the details, taking into account the diagrams, you get 13 rows of 12 blocks. Iron the top first, and then the rest of the blanket.
- Blanket assembly technique. Lay the lining on the floor with the wrong side up and secure it. Lay insulation and patchwork top sequentially on top. When the assembly is finished, pin everything together and sew 3 layers.
- Stitch. You can quilt a blanket using either straight lines or random zig-zags, like the diagram in the photo. Using the “zig-zag” technique, in the second version it will be softer and acquire a cozy convexity.
- Border. Sew all the border details in one strip, smooth the seams in different directions. Fold the strip in half lengthwise, right side out, and iron in 2 layers. In the middle of any side, you need to fasten the strip to the edge, leaving a tail of up to 30cm. It is advisable that the joints of the strips do not fall into the corners of the blanket. Sew the border around the perimeter (stitch width - half a centimeter). The edges of the layer can be overlocked, folded over the border and stitched on the other edge.
A master class for beginning needlewomen with detailed tips on how to design a patchwork quilt and assembly diagram can be seen in the following video.
You will need
- Felt fabric, thick drape;
- Regular scissors;
- Curly scissors (if there is a need to cut out a raised edge), sold in handicraft departments;
- Glue gun (or good glue for gluing fabric);
- Thick cardboard or plywood (for the base for a wall mat);
- Cotton wool or padding polyester for filling applique figures;
- Tape for potholders.
Instructions
Floor mat.
1. Strip the old item, wash pieces of fabric if necessary.
2. Outline for yourself which pattern will prevail in your product: will it be contrasting colors or a gradual transition from one shade to another? How thick will the rug be?
3. Depending on these requirements, cut strips of fabric of different lengths, but absolutely the same height: from 0.5 cm to 2.5 cm.
4. Begin to form the pattern of the rug by tightly rolling the strips of fabric into tight “rolls,” carefully gluing them together at each turn.
5. Roll up several of these “rolls” and, using your imagination, gradually include them in the overall outline of the design, continuing to lay and wrap new strips of fabric around them.
6. Finish the job carefully by firmly gluing the end of the tape. Use scissors or a sharp knife to trim uneven areas.
Wall applique rug.
1. Draw or copy from the Internet a beautiful, simple fairy tale or everyday story that your child will like.
2. For the base of the background (which is glued to a dense base), you can put either a drape, or (if there is not such a large piece of drape) another fabric, flannel, for example.
3. Cut out the shapes with scissors. If necessary, use scissors with a special zigzag edge, they will help you create a wavy edge very carefully.
4. Carefully arrange the figures according to the sketch.
5. If there is a need to give some items a small volume, place a little cotton wool or padding polyester under the fabric.
6. Glue or carefully sew the figures, embroider or draw the necessary details on them.
7. Stretch your rug over a thick base and glue it in place.
8. If desired, you can decorate it with a frame, this will give the application completeness.

Hot stand.
1. Cut the drape or felt into thin strips of the same width but arbitrary length. Choose the color to suit your taste ("matching a wooden cut", matching the color of your kitchen set, or just something bright and pleasing to the eye).
2. By rolling into a tight “roll” and constantly gluing new strips, form a mat of the required diameter.

Download video and cut mp3 - we make it easy!
Our website is a great tool for entertainment and relaxation! You can always view and download online videos, funny videos, hidden camera videos, feature films, documentaries, amateur and home videos, music videos, videos about football, sports, accidents and disasters, humor, music, cartoons, anime, TV series and many other videos are completely free and without registration. Convert this video to mp3 and other formats: mp3, aac, m4a, ogg, wma, mp4, 3gp, avi, flv, mpg and wmv. Online Radio is a selection of radio stations by country, style and quality. Online Jokes are popular jokes to choose from by style. Cutting mp3 into ringtones online. Converter video to mp3 and other formats. Online Television - these are popular TV channels to choose from. TV channels are broadcast absolutely free in real time - broadcast online.
A blanket made of “quick” squares in a “patchwork” style is a warm and soft home decoration. Read here how to make it yourself. Schemes, patterns and step-by-step instructions for beginner needlewomen.
Content:
Grandma's colorful blanket, patchwork rugs and bedding, bright pillows and potholders with multi-colored appliqué have been familiar to us since childhood. Such cute little things always filled the house with warmth and comfort. Unfortunately, only grandmothers remember the technique used to make those cozy and cute blankets. And every girl and woman should get acquainted and make friends with patchwork in order to be able to fill her hearth with something dear and close.
Fabric for making a patchwork blanket

Patchwork is patchwork sewing from fabric of various household and decorative items - beds, blankets, bags, clothes, tablecloths, kitchen utensils, etc. The technique, known for thousands of years, is popular all over the world. Skilled craftswomen create all sorts of outlandish works of art using the patchwork method. And novice needlewomen are advised to start with wide blankets made from “quick squares”. Such products are practical and aesthetic, and are also optimally suited for mastering such a delicate science.
Today, patchwork is considered one of the most popular patchwork techniques. It consists of stitching together various pieces of fabric according to the mosaic principle. In the hands of experienced needlewomen, bright pieces of material are transformed into luxurious products that surprise and delight. But not all fabrics are equally good for patchwork patchwork.
To choose the right material for creating a patchwork quilt, you can follow the traditions of our grandmothers: simply save all the scraps and leftovers from sewing clothes or bed linen. From such different-sized shreds you will certainly get a motley blanket. Or you can do it much simpler - purchase a set of fabrics for patchwork in any specialized store. Since the most difficult process in the patchwork technique is working with the material, the fabric must certainly not only be beautiful in appearance, but also of sufficient quality.

Cotton fabrics are considered the ideal material for patchwork because they meet all the important requirements:
- Do not wrinkle;
- Don't rush;
- Do not shrink;
- They do not shed;
- Easy to cut.
Sewing material stores offer customers a huge selection of cotton fabrics of different colors and densities. But, unfortunately, they are not always suitable for patchwork. Some options fray too much when cut, others are hard to iron or sag after washing. It is, however, recommended to buy special fabrics for patchwork that have undergone special pre-treatment. This material is very easy for beginners to work with.
Popular types and patterns of patchwork

The patchwork style is a wide field for ideas and experiments, which has no boundaries in combinations of shapes, colors, and types of material. Here any creative idea of the author can be brought to life. Fancy patterns, applications with animals and flowers, geometric mosaics and other equally interesting options can easily be folded into a warm bedspread or comfortable blanket.
Of course, you can create a diagram for a product with your own hands, armed with imagination and a sharp pencil. Or you can use ready-made ones, of which there are hundreds of thousands, depending on the types of patchwork.
Let's look at the most popular types of patchwork:
- Classic English. In this version of patchwork, all parts of the same shape and size are used, usually in two primary colors. Patterns for English patchwork are very primitive. For example, squares of two shades arranged in a checkerboard pattern, or symmetrically stitched triangles.
- Eastern patchwork. The manufacturing principle is similar to the classic one, but differs in the use of various decorative elements - ribbons, beads, zippers, etc. Most patterns for oriental patchwork products allow greater freedom in the shapes and sizes of parts. For example, these can be arched and wavy patches, connected and decorated with satin ribbons.
- Crazy patchwork. The most “free” look. Characterized by its aesthetics and attractiveness. As a rule, the shape, color and size of parts are not limited by anything other than the pattern used. And the designs can be incredibly diverse: images of nature or flowers, floral or geometric patterns, complete abstraction.
Making a patchwork blanket step by step
Of course, the abundance of various complex patterns and variations of products using the patchwork technique surprises even those craftswomen who have devoted decades to this type of art. And for beginners, there are more primitive, but no less beautiful and functional options. For example, a blanket of “quick” squares. It’s better to start from there.
Preparatory stage

First of all, you should decide on the color scheme and size of the future product. Although for the first time any available pieces of various shades will be suitable. Prepare in advance a piece of fabric for the wrong side of the blanket, corresponding to its future dimensions, and the same piece of padding polyester. Don't forget about the fabric for the edging. It is better to buy it with a reserve. In our case, to make a blanket from squares you will need chintz of three colors, scissors, a ruler, pins, chalk, a template and a sewing machine.
It is recommended to pre-soak chintz fabric in hot water, then rinse with cold water, starch and iron. A tablespoon of starch is diluted in a glass of cold water. Then the mixture is poured into 2 liters of hot water and stirred thoroughly. The chintz is rinsed in a slightly cooled solution, ironed while still wet and dried.
After preparing the material and collecting all the necessary tools, you can begin preparing those very “quick” squares that will make up the blanket.
Preparing “quick” squares for a blanket

The production of the elements we need begins with the preparation of the strips. From two pieces of fabric of different colors, cut two strips of the same width. Then, placing them face to face, stitch along one edge. At the next stage, cut a wide strip from the third piece of chintz, corresponding to the size of the previous two together. Sew the resulting third strip to the first two on both sides, first folding them face to face, just like the first time. As a result, you will end up with something like a sleeve turned inside out.
At the next stage, cut the resulting sleeve with an even zigzag into isosceles triangles. To do this, use a square, triangle or triangular ruler template. As a result, from one long “sleeve” you will get several double triangles, and, accordingly, squares in the spread.
Assembling squares using patchwork technology

To create a product in the patchwork style, a wide variety of patterns and styles are used. The squares you have can be folded into zigzags, scales, triangles or diamonds. The choice of style depends only on the taste of the craftswoman. It is not recommended to rush in such a matter. It is better to fold the parts in several different ways, among which it will be easier to determine the most successful one.
The assembly of “quick” squares is carried out as follows: first, the parts are sewn together into longitudinal strips, only then the strips are sewn together. The main thing is not to forget to iron the finished seams. Essentially, the front side of the quilt is complete at this stage.
Making a blanket from “quick” squares

You can use any fabric, preferably natural, as the back side of the blanket. Batiste or chintz will do the job best. To quickly assemble a blanket, place the prepared fabric for the wrong side face down, then spread a layer of padding polyester and place a piece of squares on top, face up. Using a sewing machine, stitch around the perimeter of the future product. The border can be the edges of the picture or the edges of the squares.
Before the process is complete, all that remains is to make the edging of the luxurious blanket. To do this, you need to cut a strip of suitable fabric 8 cm wide and slightly longer than the side of the product. Apply the resulting strip to the front edge of the blanket, aligning the edges. Use a sewing machine to stitch the strip to the blanket, then fold it over to the wrong side, turn it under, and stitch again to the right side. Finish the remaining edges of the blanket in this way.
At this point, making a blanket from “quick” squares is considered complete. For the first time, such a product is considered optimal in terms of complexity. But even if the result is not entirely ideal, you should not be upset. The second try will certainly turn out better!

Nowadays, patchwork creations have become more popular than ever. In between the noisy bustle and tiring workdays, you really want to touch something warm and cozy. Even those women who have never thought about needlework before begin to confidently master patchwork. Decorative sofa pillows, aprons, coasters, colorful panels, curtains for a country house, ultra-modern bags and many other things can be created by experienced craftswomen.
Beginning needlewomen should pay attention to a few useful tips:
- Before using new fabric, it must be washed, ironed and only then cut. This will prevent accidental shrinkage, loss of color, or other problems.
- The color of the thread used should match the color of the shred or differ by a couple of tones.
- For drawing, use a pencil or soap. It is prohibited to use a pen.
- Cutting is done along the shared thread. In this case, the part will not warp.
- When cutting, leave a 1 cm indent on all sides. If the fabric is loose - 1.5 cm.
- Ideal templates are made of plastic.
- Without a ruler, patchwork is impossible.
- The resulting fragment must be ironed after each line.
Patterns for making a blanket using the patchwork technique

Depending on the chosen patchwork technique, the needlewoman may need one or another pattern pattern:
- Square technique. It involves creating a product from square patches or square blocks of different colors. In this case, a pattern in the form of a regular square or a pattern of strips from which a square block will be made will be useful.
- Strip technique. This is parallel or circular stitching of strips of different colors and lengths. To create a product using this technique, you will need to cut out different strips.
- Triangle technique. Much like squares. Most often, patterns of isosceles triangles, identical in size, but differing in color, are used for it. Parts can be sewn along a short edge to form a strip, 4 pieces to form a square or in the shape of a star.
- Honeycomb technique. It got its name thanks to the end result. Upon completion of the work, the design of the product will resemble the pattern of a honeycomb. For production, patterns of symmetrical hexagons are used.
- Lapachiha technique. It is considered the most interesting and at the same time difficult. Pieces of fabric with raw edges are attached to the canvas, thereby forming a three-dimensional drawing of a certain pattern or a chaotic image of a three-dimensional abstraction. If a specific pattern is chosen for the product (bird, animal, flower, etc.), patterns for each part will be needed. If you plan to randomly sew on different patches, you can do without patterns altogether.
Products made using the patchwork technique are not only beautiful and cozy home decorations, but also positive emotions from the process of making them. Agree, a few pieces of fabric, a sewing machine and imagination in combination can work wonders.


