DIY symbols. How to make a badge with your own hands - making options (simple and complex). Pompom pig
7 338 354
The symbol of the coming 2019 is a yellow pig. In this article we will look at several simple step-by-step master classes on how to make a piglet with your own hands.
We will show in detail how you can make your own from materials that can easily be found in every home, such DIY crafts for the year of the pig as a piggy bank, we will make piglets from dough, we will make simple crafts for kindergarten, we will learn how to sew a pig from children's tights and socks, we will make a pig-ball from threads, we will make a coffee toy, and we will also learn how to sew a tilde pig from fabric. And at the end of the article you will find a video bonus: making a pig from pompoms as a gift for the New Year. So, if you're ready, let's get started!
Papier-mâché: piggy bank
To make a funny papier-mâché piggy bank, we will use toilet paper or newspapers, acrylic putty, acrylic paints, PVA glue, an inflatable balloon, foil, and a foil reel.
First of all, you need to inflate the balloon. Then we apply prepared scraps of newspaper soaked in PVA glue and water onto the inflated ball in several layers - so that our piggy bank is not soft, but strong enough, and let it dry.

In a plastic bucket we will prepare the papier-mâché mixture: tear toilet paper or napkins into small pieces and add PVA glue. Mix everything properly! We coat the future pig with the resulting “chewed paper”.

When the papier-mâché frame dries well, the ball must be carefully burst and pulled out. Now we need to close the hole through which we pulled the ball out: to do this, we will seal it crosswise with masking tape and apply papier-mâché, leaving a small rectangular hole - this will be a slot where money is thrown.
We divide the foil reel into four equal parts - it will serve as legs for our pig. Glue the legs to the pig with masking tape. Then we apply papier-mâché. The inside of the legs must be filled with something heavy - this will make our pig more stable. Sand or some small metal object, such as a nut or screws, will do.

We make a snout for the pig from foil, under it we need to form a mouth (upper and lower lip).

Now we need to sculpt eyes and ears for our pig - they can be made either from the remains of papier-mâché or sculpted from clay.

The flexible wire will serve as a tail for the pig: twist it, covering the tail with the remains of papier-mâché. After our pig has completely dried, it must be properly treated several times with acrylic putty and then wiped with a cloth dampened in water - this will level the barrel of the pig.

Our piggy is ready for painting!

First you need to apply dark paint, you can use several different shades. Then red paint is applied to the craft with a sponge.

Then - pink, and as the final stage - pink and white paints are applied. The last step is to apply white paint to the protruding surfaces. Our piggy bank is ready!


We offer you another version of the piggy bank, the step-by-step implementation of which you can watch in the video:
Pig pendants made from salt dough
As a wonderful souvenir gift, you can also make a pig pendant at home from materials that can be found in every home - flour and salt. It is very easy to make such a pig, it turns out very cool and is suitable as a mascot that any child will be happy with, or as a craft for kindergarten. Below are step-by-step instructions on how to make such a souvenir.Simple DIY crafts for kindergarten
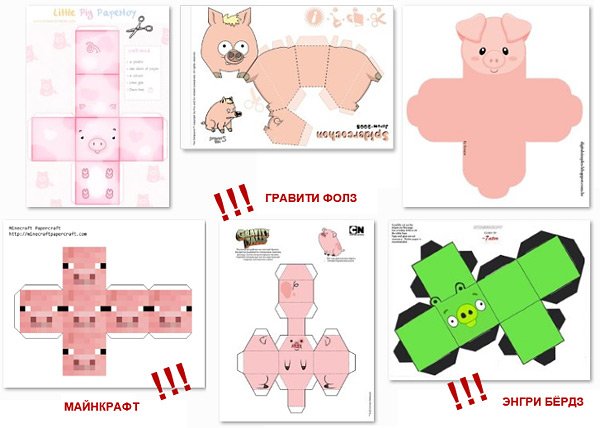
Products that can easily be made include a paper craft, a costume for a children's party - a mask and pig ears, as well as a pig in a pen. Let's take a step-by-step look at how easy it is to make these crafts yourself.Paper craft
To make such a toy paper souvenir, we will need: a pencil and a black marker, a ruler, colored paper - pink or red, as well as silver, a stapler and glue, pre-prepared plastic eyes, and a ribbon for decoration.
The body of our pig should be voluminous; For this we will need colored paper - pink or red. We cut out an even rectangle from paper, connect the edges with glue or a stapler so that we get the base body for our craft - a tall and wide tube.

Next, we make the basis for the pig’s face: we take paper of two different colors, from one we cut out a larger circle - the head of our piglet, and two small triangles-ears, from the second - a smaller oval-patch. You can take pre-prepared plastic eyes for the pig, or you can cut them out yourself from other colored paper.

Now we need to connect all the parts we cut out: bend them and glue the ears and snout to the head in sequence. On the patch we will add nostrils and a smiling mouth underneath. We draw eyelashes on the eyes.

Now you need to cut out the remaining details from multi-colored paper - for the pig’s belly we’ll take a silver color, and red for the front legs and tail. We glue the prepared parts: we glue the long legs on the sides of the pig's body, the tail - to the back of the craft, the tummy - in the front.

We tie a thin ribbon around the pig's neck and tie a smart bow. Our pig is ready!

The finished paper pig craft can be presented as a New Year's present, and it will also look good on a decorated Christmas tree as a toy.
You can also make the following craft from cardboard:

Costume: mask and pig ears
It is very easy to prepare such a costume for a children's party yourself, since it does not require sewing and its production will take only a few minutes.
For a costume consisting of a pig's snout, ears and tail, we will need:
- felt or fleece in pink and white colors,
- scissors,
- glue,
- stapler,
- paper cup,
- elastic pink ribbon,
- thin elastic band,
- white thin plastic hair hoop.

Then we take an elastic band, fold it like a belt, attach the tail we prepared in the middle and fasten it with a stapler or glue. Curl the tail like a pig. One piece of the costume is ready!

Now let's start making the patch. To do this, take a cardboard cup of small diameter, put a piece of pink felt on it, trace and cut out the resulting circle - this will be our patch. Cut off the top of the glass so that the height of the glass is one and a half to two centimeters.

We cut a rectangular strip of the same width from the felt so that we can wrap our cup. Now we glue our cut out parts to the cup: a circle to the bottom, a rectangular strip along the entire cup. It turns out to be a cute pink patch!
We cut out two small oval parts from white felt - nostrils. Glue it onto the patch exactly in the middle.

We make two small holes on the sides of the cup into which we insert a thin elastic band. We tie an elastic band inside the cup-patch on each side into a large knot. We try our nose on our head; it should hold tightly enough so that it does not fall off, but also does not press too much. Our nose for the pig costume is ready!
Let's start making ears. To do this, we need to cut two large pieces in the shape of pig ears from the pink felt. Then we take our hairband, gather our ear, clamp it and wrap it around the headband, secure it well with glue.


Our costume for the holiday is ready!
Pig in the pen

To make such a textile craft we will need:
- empty plastic bottle with a volume of 0.5 liters,
- plastic eyes,
- 4 plastic lids,
- a piece of light felt or felt material,
- a small piece of flexible wire
- a piece of padding polyester,
- nylon white stocking,
- colorful paper,
- several wooden skewers,
- skein of twine,
- shoe cardboard box lid,
- gouache red and white,
- clear varnish,
- hot glue,
- a few pebbles, acorns and twigs.
We cover the inside of the box with green paper and weave a fence using twine around the glued skewers. We put acorns and pebbles in the pen, put a plastic jar - a feeder for our pig, and arrange tree branches. Our pen is ready!

Now we make a pig from a plastic bottle: we cut the bottle into several parts - the bottom, the middle and the neck. Connect the neck to the bottom and glue it using hot glue.

Using scissors, carefully cut out the mouth under the neck of the bottle. We cover the bottle with padding polyester and also make a mouth hole using scissors.

We tighten the stocking around the body of our workpiece, cut out a hole-mouth and secure it with hot glue.

Our stocking knot on the neck of the bottle must be closed with a snout: to do this, cut out a circle from white cardboard, cover it with nylon, tie it with thread - our snout is ready.

The knot on the bottom of the bottle must also be closed with a wire tail, which we first cover in the area of the butt with nylon.

Cut out the pig's ears from light felt and glue them to the head.

We prepare the legs: take plastic plugs, cover them with padding polyester and nylon, tighten them with thread, secure them and glue them to the pig’s body with glue.

Prepare the gouache: mix red and white colors to make pink. We paint our pig evenly. Apply clear varnish on top. After the craft has dried, glue on the pig’s eyes and nostrils. Our piggy craft in the pen is ready!

We sew a pig from children's tights
Making such a souvenir will not take much time; for this you will need synthetic padding, children's tights or socks and a little imagination. The piggy craft is easy to complete by following the step-by-step instructions below. Ready? Then let's get started!Socks also make good piglets:

Pig ball made of threads

To make such an original craft we will need the following materials:
- pink threads/yarn,
- colored paper,
- scissors,
- round or oval inflatable ball,
- PVA glue,
- a plastic cup,
- needle.

We wrap our inflated ball in a chaotic manner with a thread dipped in glue to create as many weaves as possible. The larger the layer of wound thread, the stronger the craft will be. You can stop gluing the ball when it is almost hidden under a layer of thread.
It is necessary to remember that the glue takes a long time to dry, about a day, so such a craft must be prepared in advance before the holiday.
After the glue has completely dried, you need to pierce the ball with a needle and carefully remove it from the craft.
The legs of a piglet are made in the same way: a sausage ball is inflated, wrapped with thread, then after the glue has dried, the ball must be carefully burst and removed from the legs.

Now you need to glue the legs to the body; While the glue dries, we can start making the pig’s face. To do this, on colored paper we first need to draw all the necessary details - a snout, eyes and ears, then cut them out and glue them onto the pig’s body.

Then you need to stretch a long thread and secure it with a loop knot - it will come in handy if we want to hang our craft on the Christmas tree.
Coffee toy
A New Year's pig souvenir in the form of a coffee toy is also easy to make, its design is quite simple, but it will have an exquisite aroma of coffee, vanilla or cinnamon and will give its new owner only positive emotions. Let's start creating a coffee toy!The technique for making such a souvenir is quite simple, and to make naf-naf we will need: light calico, light threads, stuffing material - padding polyester or foam rubber, vanillin or vanilla sugar, cocoa, instant coffee, cinnamon, scissors, PVA glue, needle, old toothbrush, gel pen, small container for diluting fragrance, brushes, acrylic paints.
First, you need to prepare and cut out a template - you can attach tracing paper or thin paper to the monitor screen and trace the outline of the toy from the photo.


The toy can also be cut out to any size; to do this, just click on the picture and its size will increase. It is also advisable to transfer the cut out pattern to thin cardboard - it is more practical and convenient.
Now we will need our pen - we will use it to trace the resulting pattern; This should be done on fabric that is folded in half; if you plan to sew more than one toy, then you need to leave a space on the fabric between the patterns for a seam allowance of about 0.5 cm, while the seam itself is best done not along the drawn line itself, but nearby: the mark from the handle will not be noticeable if the fabric gets wet.

It is necessary to sew two layers of fabric along the line at the same time; the seam begins and ends between the hind limbs of our craft, leaving about 2 centimeters unsewn - this hole is necessary to make it more convenient to stuff the pig. Also, you can’t cut the seam threads so that it doesn’t come apart when we turn and stuff our pig.

We also cut out triangular teeth at the seam allowances, leaving a distance to the seam itself of about 0.2 cm - this will allow the seam on the toy to remain smooth and not bulge in different directions.

Now we turn it inside out and stuff the stitched pig; For particularly narrow spaces, the ends of folded scissors are suitable. We fill the toy with padding polyester using the unsewn holes: the more padding polyester there is inside, the more “plump” and “pot-bellied” our pig will be. It is necessary to carefully sew up the holes through which we stuffed our pig and thread it - this will help us easily hang our pig to dry.

Now let’s prepare the flavoring for our craft: dilute 40 ml of boiling water in a prepared container and add a teaspoon of coffee. Then the remaining ingredients - vanilla, cinnamon, cocoa - add about a quarter of a teaspoon to the resulting mixture.
Stir everything thoroughly and cool. Then you need to add about half a teaspoon of PVA glue to the mixture and mix thoroughly.
Apply the resulting composition to our pig with a toothbrush so that the fabric is stained and not completely saturated.

Now we need to dry our toy; To do this, hang it on a rack in the oven, turned on at low heat, for a quarter of an hour.
If, after drying, there are still wet spots on the toy, you need to turn off the oven and dry our workpiece in this way.
After complete drying, the fabric soaked in the coffee adhesive solution will become rigid, and any funny design can easily be applied to it.
Let's start painting - first with a simple pencil to outline the details, and then with acrylic paints. After the paints have dried, you can attach a loop or magnet to the coffee toy - then you can hang it on the Christmas tree or on the refrigerator.

It is advisable to avoid getting the toy wet. Our wonderful DIY coffee pig is ready!


Sew a tilde pig

In order to make such a wonderful souvenir, we will need a printout of the pattern, cut out and transferred to the selected material. The best material for such a toy is natural, plain light fabric, such as linen, cotton, calico, poplin. You can take materials left over from old clothes or a new piece of fabric.
The pattern itself consists of several parts - the pig's body, ears and legs.

The fabric must be folded in half, the pattern pieces placed on top and outlined; Don't forget to leave 0.5 cm on the seams. Now we cut out the resulting parts and sew them together as shown in mk.

Be sure to leave holes for filling the craft with stuffing and in order to sew on the pig's tail. Next, we need to sew the resulting parts together and turn them inside out. We fill the craft with filler, for example, padding polyester, holofiber, padding polyester; You can also put a flavor sachet into the pig.
It is necessary to sew the legs and ears to the body of the pig using a hidden seam. We decorate the muzzle: you can glue plastic eyes, sew on beads, embroider with threads or paint, nostrils can be drawn or embroidered with floss; You can paint a blush on the pig’s cheeks, so it will become more elegant.

In order to make the last detail of our pig doll - the perky tail - we will need to cut out a rectangular piece of fabric that is suitable in size, and sew a piece of flexible wire into it.
We fix the tip of the wire inside the tail with glue.

After the glue has dried, pull the second, free end, and it will take the shape of a pig's curled tail. We sew the tail into the body of our toy.

See below for a few more options for textile piglets:


Video bonus: pompom pig
This video presents a master class that step by step reveals the process of making a pig from homemade pompoms.All the step-by-step instructions presented in the article for making homemade pig souvenir toys - the symbol of the coming 2019 - are very simple; their repetition requires simple materials that can be found in every home. With a little patience, skill and care, you can make any of these toys yourself.
You can arm yourself with threads and nails and make paintings in the style of pig string art:


A pig souvenir is a gift that will not leave anyone indifferent; it will give joyful emotions to everyone! Dare and create with our master classes!
Liked? Tell your friends:
You may also like...
On the eve of the New Year, men, women and children who prefer to create gifts and souvenirs for their loved ones with their own hands can try to independently recreate souvenirs associated with the Eastern horoscope from improvised means. Such a creative approach will certainly attract the attention of the patroness of 2019 - the Yellow Earth Pig (Boar), giving the home atmosphere a little magic and the feeling of a fairy tale. Well, if children also participate in the process of repeating one of the master classes, then it is possible that they will take a good example from their parents, repeating this tradition from year to year. In addition, as the Eastern horoscope belief says, if a thrifty but not too careless pig likes him, he will give his admirer good luck, health, and just a happy year - interesting, isn’t it?!
The pig is a domestic animal considered sacred by Muslims. Therefore, on New Year’s Eve, you not only cannot cook dishes from her meat, but you also need to treat her person with respect. Crafts with the image of a cute pig or a charismatic boar are something that will be a good addition to the festive interior decor and the main gift for family and friends. Embroidery on towels, pillowcases for decorative pillows with classic cross stitch and satin stitch, weaving from beads and small beads, the art of macrame, appliques on thick material and cardboard, handmade postcards, origami art, figurine made of plastic, dough and elastic plasticine - only part of it , which can be seen in the article below.
Pig (Boar) symbol of 2019 with your own hands, what crafts can you make?
The choice of a suitable craft with the image of a pig depends on what it is created for. For example, if you really want to decorate a room, the ideal solution would be to make intricate but beautiful origami out of white paper, a garland of many shiny snowflakes cut out of foil, as well as original toys in the shape of a pig’s heel or face to decorate the Christmas tree.
You can also highlight your kitchen interior by sewing an oven mitt in the shape of a pig. Well, for bedroom and nursery decor, a good idea would be to sew pillowcases with hand embroidery, tilde pigs and knitting little pigs from yarn.
Little crafters can be offered simple beading patterns, puff pastry modeling and cutting out protrusions for window decoration. It is very important that there is a step-by-step master class with photos nearby, then the symbol of 2019 with your own hands will come out no worse than that of a professional.
First master class - embroidery on a decorative pillow (pillowcase)
To highlight the interior of one of the rooms where there is a sofa or bed, it is enough to embroider a pig on small pillows or the pillowcases that come with them. Her image can be located on one part of the pillow or on the entire front side of the product. The sketch can include one pig, lovers, little piglets or fairy-tale pigs from your favorite Soviet and foreign cartoons.
To repeat the master class step by step with your own hands, depicting the symbol of the year using a gypsy needle and floss threads, you will need not only these tools, but also others: a pillowcase (the pillow itself), an embroidery pattern, a hoop (to secure the work), scissors.
The photo below shows the best diagrams and templates that will help you make a beautiful applique. They can be printed using a printer at home or in a photo studio. To do this, just save the option you like by downloading the image to your desktop or downloading it.

Pig on the meadow (grass) photo

Piglets in caps


MK - toy pig on a spruce branch
A pig can be either a pet or an inanimate object used as a decoration for a beautiful Christmas tree. We are talking about a homemade holiday decoration with a pig's face.
There are several options for master classes. Some involve creating a talisman-decoration from felt and thickened suede, leather and denim, while others are based on cheaper and more practical paper-based material. The choice depends on the ability to work with a particular material, as well as its availability at home.
The photo below shows examples of unusual toys that are easy to replicate even without experience in the creative field.


Pig potholder - third master class
A pot holder in the shape of a pig will be a useful and incredibly practical gift for the fair sex. A hand-sewn kitchen accessory will certainly attract the attention of mothers and grandmothers, as well as a beloved sister, close friend and even an aunt. The cute face of the 2019 symbol on the front side of the product will make cooking a more vibrant and interesting process, and the kitchen interior will be unique, thought out to the smallest detail.
When choosing a color scheme, it is better to prefer the classics of soft pink, coffee and black. The decision depends on what result you want to achieve. For example, if you want to make a pig, then it is better to make a choice in favor of a rich or pale pink shade, and a dark, calmer shade for the boar. The nose and ears can be highlighted in red and charcoal, the eyes can be sewn in the shape of small peas, and chestnuts, straw, a bow and even a cute scarf can be used as an addition.

Crocheted potholder in the shape of a pig photo

Potholder pattern photo


Pig (piggy) made of buttons - a simple and interesting Master class
The symbol of the year 2019 can be made from paper, fabric and beads, as well as small items found in every housewife’s needle case. We are talking about buttons of different colors and sizes, mounted on thick cardboard or a plain light-colored fabric. Not only the audience of 25+ can make such a craft, but also preschool children and elementary school students who have step-by-step photo instructions at hand.
Examples of work and a visual master class in the photo below will help you create incredibly beautiful and unusual crafts for the New Year, which you are unlikely to see in your friends and family’s home interiors.

Origami from paper and cardboard diagrams - paper master class No. 5
So that children do not watch their parents, but are busy with interesting things, you can try to interest them in the art of origami. Folding paper according to thoughtful patterns will help bring to life the figures of various animals, birds, mammals and inanimate objects.
Origami was first created in China many centuries ago, and since then it has gained many fans among people of different ages. In large cities, even training exercises are being created to master this difficult technique. Teachers who ideally know origami patterns teach children and inquisitive adults what they themselves can do. So why not try, on the eve of the Christmas holidays, to create a symbol of 2019 from a white A4 sheet.


Master class No. 6 - beaded pig, simple patterns
Weaving a pig, a pig and a boar from beads and wire is not as simple as it seems at first glance. Complex technology requires a lot of effort, time and patience. Each pattern involves connecting miniature beads of different colors together.
Important! Instead of thin aluminum wire, you can use fishing line, which does not break under load and can last for more than one year.


Master class No. 7 - felt pig, pattern
If a child loves soft toys and is always happy to receive a new plush pet as a gift from his parents, why not combine business with pleasure by creating a safe gift with your own hands that does not cause allergic reactions. A cute felt pig is a complicated craft, but it’s worth repeating again using the master class with photos below.
The symbol of 2019, made with the help of such tools as: a pattern, threads, felt, a needle, filler in the form of padding polyester or cotton wool, a glue gun, buttons and fabric paint to draw the eyes of a pig will help you create a masterpiece from nothing within a few hours.
To complete the work, just repeat the step-by-step master class given below to get a soft toy that your child will like, becoming his amulet for the next 365 days.


Master class Pig No. 8 - piggy bank (piggy) from a plastic bottle
It’s easy to create a capacious piggy bank with your own hands, personifying the shell of the patroness of 2019 - the Yellow Earthen Pig. True, comparing it with other crafts, it is better to make it by an adult. Due to the small plastic objects required in the master class that need to be cut out with scissors or a knife, sharp edges, wire and oil paint, creating crafts with children’s hands is not safe and is harmful to health. Therefore, if you make a masterpiece, then only for your parents.


Master class No. 9 - pig bowl for the garden and vegetable garden
If you have an empty 5-liter plastic bottle, paint and small bottles at home, making a pig-shaped bowl is not difficult. The step-by-step instructions are an almost identical version of the piggy bank. The only thing that distinguishes that craft from this one is the cutout on the top.

Flowers in a pig bowl photo

Master class No. 10 - piglet from foamiran MK
A small pig made from foamiran or, as it is also called, foam Eva, is becoming increasingly popular among needlewomen of all ages. Elastic rubber or a material somewhat reminiscent of a suede surface is what will help create a beautiful souvenir that can be presented to friends, colleagues and good acquaintances in the form of a small present.


Master class No. 11 - polymer clay pig
Making a pig or polymer clay is the same as making a pig from plasticine. Not only mom and dad, but also their child can reproduce a small but very beautiful baby, using basic step-by-step instructions, as in the photo selection below.


Master class No. 12 - pig made from satin ribbons
You can create not only crafts, but also beautiful accessories that can be used to decorate the little princess’s hairstyle for a matinee or New Year’s celebration. Cute pig faces created from coral and peach satin ribbons are an interesting and very unusual addition to high ponytails, hair buns and small bumps.

Hair tie with pig (pig) photo

Master class No. 13 - pig made from felt (felt wool)
A soft and neat pig made of felt fabric can become not only a souvenir that can be put on the wall or given to a friend, but also a symbolic keychain, an addition to the key holder and simply a talisman directly related to the hand-made symbol of 2019.

Craft from a toilet paper roll
Pig from a toilet paper winder - allows you to use household items without waste. Step-by-step creation of a symbol of the year from available materials will allow children under 7 years old to develop their creative potential.
The photo shows several variations with pig.

Balloon pig
Despite the fact that balloons are usually used to decorate the interior for a birthday or the birth of a baby, the New Year is another reason to please yourself and your loved ones with a festive interior. A pig consisting of 10 or more balls will be a good subject for a New Year's photo shoot and a reason for a positive mood.


Symbol of 2019 made from newspaper tubes
A pig made with your own hands from newspaper tubes and painted with paint can become an original piggy bank, a basket for fruits or vegetables, or a candy bowl. The choice in favor of one of the decorative items depends on the experience of the craftswoman in creating decorative items and the interior of the house itself.

Piglet made of clay, photo MK
Clay can be used as a base material to create a small talisman that brings good luck, health and love. A DIY symbol of the year made from polymer clay is a good start for creating simple and complex figures for the New Year.


Pig made from geometric shapes
Geometry in creating appliqués will teach your child how to create beautiful New Year cards and crafts for the holiday. Circles, triangles, cut ovals, squares - everything that can be combined in one craft.


Especially for men - a barbecue made from a gas cylinder
Pork can not only be cooked, but also used as a “frying pan”. A brazier made from an old gas cylinder in the shape of a large pig can be used as a brazier in a summer cottage.
Important! It is necessary to cut the gas cylinder with extreme caution, having washed it in advance.

Barbecue in the shape of a wild boar


Corrugated paper pig
You can make the symbol of 2019 with your own hands using step-by-step instructions from corrugated paper. To create a miniature pig, you only need corrugated paper, scissors and a round base for attaching small parts.
In addition to large pigs, corrugated paper can be used for appliques and 3D cards.


DIY wooden figure photo
You can carve a pig out of wood if you know how to work with it. Or, as a last resort, buy a finished work in a store. The decision is always up to our readers.
Examples and ideas of finished works can be viewed below.


What other materials can you use to make a pig with your own hands? List:
1) scraps of fabric;
2) light bulbs;
3) LEGO constructor;
4) socks;
5) thread;
6) plush;
7) textiles;
8) shells;
9) eggs;
10) tomatoes.
Pig from nylon, step-by-step master class in the photo

DIY towel pig


Pig 2019 is the symbol of the year made from plywood in the photo:


Finished works and ideas in the photo:

DIY symbol of the year 2019 from a sock photo


The approach of the New Year and Christmas is always a pleasant and bright event. In every home, on the streets, on store shelves, in courtyards, in school classrooms and kindergartens - everything breathes holiday. There is a special atmosphere in people's moods. And today we’ll talk about how to make New Year’s crafts depicting the symbol of 2019 with your own hands. I think many people know that the coming New Year, if you look at it through the “pages” of the eastern calendar, is the year of the pig or boar, these 12 months simply have to be good - the pig is a homely, well-fed, fertile and generous animal. So let’s prepare something nice for the boar in the form of a simple New Year’s decoration with his images and wait for a return gift.
I want to offer you very simple and at the same time bright and interesting ideas for New Year’s crafts, which are suitable for assignments in kindergarten or school as a handmade gift from your kids, for relatives, close friends or guests.
Some of the projects from this collection are made of paper, others of felt, but we tried not to look for complex ones - this was one of the most important criteria, since we all remember the lack of free time, especially on the eve of the holidays.
A pig can be called a geometrically convenient animal, you will agree - two circles for the body and a heel, a couple of triangles for the ears, and four squares for the hooves... cut out, glued and that's it - the pig is ready. Well, let's look at the options for our crafts.
Craft symbol of the new year 2019
One of the most adorable craft ideas for the new year 2019 is a cute pink pig, thanks to the texture of the material, we will make it from cotton balls, slightly painted with light pink gouache. It looks like the craft is made from pink snowballs that the kids just made in the yard.

“Snowballs” are attached to a disposable paper plate or a circle cut out of any cardboard of the size you need. This project uses hot glue gun. We make the ears and snout from colored or pink-painted paper; by the way, you can also make a tail from it. We buy the eyes ready-made or draw them with a marker on a small piece of white cardboard and attach them to the craft. The finished pig can be sprinkled with glitter.
How to make a pumpkin pig craft
This year, handmade crowns are my favorite theme. Especially when it comes to all kinds of animals! Since the symbol, according to the eastern calendar, of 2019 is the pig, we’ll look at it. Well, first of all, this is a very harmonious combination: pumpkin and piglets)

For this option, we will need a pumpkin of any variety, but preferably a round, fairly even shape. The pumpkin can be painted any color - it's up to you. The ears are combined from two types of fabric - the basic one without ornament - both the snout and the mottled one for the inside of the ear are made from it. We make eyes and nostrils from black beads or buttons. The parts are attached using hot glue.
DIY Christmas tree toy
A great idea on how to make a Christmas tree decoration depicting the symbol of the New Year is to draw a piggy’s face on a single-color pink ball. This holiday decor can be the start of your personal collection of your family's designer toys. Pigs can be of different colors and sizes, the spots and the expression of the eyes are also a personal matter, so just give free rein to your imagination.

It is better to paint on the surface of the selected Christmas tree ball with acrylic paints; first apply light paints to the ball, and apply black or dark elements last. On the back of the toy, draw a curled, cheerful tail of your charming pig, so she will be beautiful from all sides)
Craft piglets - symbol of 2019
For this charming couple of piglets, we will need two (if desired, more) empty eggs, so to speak, if you want to make animals of different sizes, then use a chicken and duck egg, or simply choose two different chicken eggs, making small ones on both “tops” holes using an awl or a thick needle and remove the liquid contents, rinse the shells and let them dry.

We make a puddle for our piglets from brown cardboard or paper, you can also use felt. For finished patches, glue buttons with two holes with hot glue so that they are positioned horizontally. We draw the eyes with a black felt-tip pen or a thin marker, and cut out the ears from pink paper. We construct hooves and tails from “fluffy” wire and place the piglets in a puddle - in the good sense of the word.
New Year's toy - fleece pig
For those who really have hands of gold, an excellent idea for creating a New Year's toy with your own hands is this charming “representative” of 2019 - a pig sewn from pink fleece fabric. Such a handmade item can not only be placed under the Christmas tree, but also given as a New Year’s gift to a loved one.

As a filler for such a soft toy, you can use synthetic polystyrene and small polystyrene foam balls, which can often be “found” inside anti-stress toys and in pillows for pregnant women - they are not only very pleasant to the touch, but also safe and environmentally friendly. The size of such a pig depends on your idea.
Paper pig craft
For the youngest artists and creative individuals, there is also a great project, the simplest of our entire list today, but at the same time very cute and pretty. For a paper pig we will need a disposable paper plate, a black felt-tip pen or marker, a little office glue, pink gouache paint and paper for the snout, eyes and ears.

We paint the plate with gouache and set it aside to dry, in the meantime we cut out the snout and ears - we have them the same color, draw eyes on white paper and cut them out, when the plate is completely dry, glue the rest of the parts to it with office glue and finish drawing the nose and smile - the craft is ready. Simple and cute!
DIY pigs for the new year 2019
You can even turn small flower pots into adorable little hogs, you just need to give free rein to your inner artist, find a couple of plastic buttons and a fairly hard material for the ears. Paint the pots pink and attach the ears and heels using hot glue or super glue for plastic and ceramics.

When the craft is dry, draw eyes on the pigs - even nail polish or a stroke will be suitable for this purpose. For more charm, you can draw eyelashes or smiles on these cute faces with a black marker or felt-tip pen, but this is not strict - do it as you and your child like.
How to make a New Year's craft - a pig's face
Another simple and wonderful craft for the 2019 New Year - adorable faces of felt pigs. For such a miracle, patterns are not particularly needed - we just select a basic piece of pink material, draw the silhouette of a muzzle on it, and make the inner parts of the ears from felt of a different shade and a slightly smaller size. The patch can be made round or oval - this is not strict. If desired, by the way, this craft can be made double-sided by simply sewing two ready-made faces together.

We embroider the eyebrows and smiles of our cute pigs with brown or black threads. For the eyes, shiny black rather large beads or beads are suitable, see what you have at hand. Sew loops of a suitable length to the crafts, and now we have a DIY Christmas tree decoration in front of us.
Piglets for the New Year - crafts
This New Year's craft is more difficult, but if your hands grow from the right places, then you can do it. This pair of charming pink beauties is not just a symbol of the coming New Year, but a full-fledged gift! Agree, such handmade things, created with love and soul, simply cannot but please.

The soft texture of felt and these adorable knitted scarves pair perfectly with each other and with the festive winter atmosphere. It is believed that such material symbols will bring good luck to their owner all year, in which “pissiness” is the best omen, even if the amulets are so cool.
Felt pincushion in the shape of a pig
Here's an idea for a cute and very practical gift - a felt pincushion in the shape of a pig. Such a craft will surely please your mother, your beloved grandmother, your older sister, and any needlewoman. The first advantage of this project is its ease of execution and the second is the minimum required materials and special sewing skills, by the way, are also not required.

We will need 6 squares of felt (of sufficient density) of pink color, a small piece of a lighter material - for the snout and ears, thread, a needle, a little filler - synthetic padding is perfect - and two small beads for the eyes. We will sew the craft with a regular seam - over the edge, you can choose the color of the threads to suit your taste, and you can also embroider a snowflake or initials on one of the sides of the pig to the person you decide to give it to.
In general, New Year’s crafts, whether it’s a card or a card that we make ourselves, are a great reason to spend time with your children, stay longer in your own winter fairy tale and create your own New Year’s craft, even if it’s simple and small, but still a work of art. If you figure it out, you can mold, cut, glue or sew something interesting from what you have at hand, the main thing in this matter is the mood. I think that you have already chosen an outfit and decided what to give to whom, chose and made a list, signed Christmas cards and got ready for a long weekend) All we can do is wish you good holidays and may Pig bring us good luck, health and good mood for the rest of his life, so to speak, a year of service!
New Year 2019 is the Year of the Pig. If you suddenly thought that this animal couldn’t be beautiful or at least cute, then... it seemed to you! While this article by Krestik was being prepared for publication, I was convinced from personal experience how charming a hand-made pig can be! Very soon, countless souvenirs will fill this world) So let the piglets, pigs and pigs be magnificent! A traditional exclusive for Krestik readers - a SUPER SELECTION of the best ideas and master classes on creating the symbol of 2019 with your own hands!
DIY paper pigs
Applications in the form of piglets
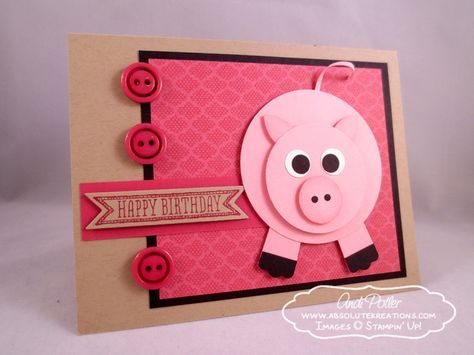
The easiest way to create a craft with the symbol of 2019 is to glue an applique out of paper.
Cut out hearts of different sizes from pink paper and glue the pig together:

To glue the chamomile pig, print the template, cut out the parts from colored paper/cardboard in the desired shades and glue to the base:

Pig is a quite popular character, take Peppa Pig for example :) If your child likes the characters of this cartoon, then let them make an applique out of paper!
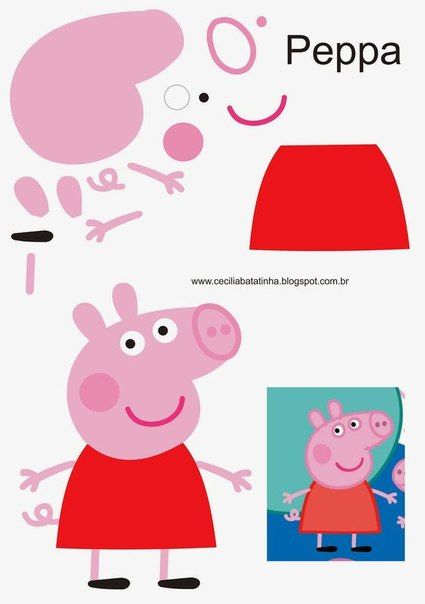

The templates can be printed on a black and white printer, cut out all the details, and then put them on sheets of colored paper and trace them.
See how it's done:
The easiest way is to glue the finished applique onto a square or rectangular one:
which allows you to insert a banknote into a postcardThe same application can be used in different ways:
Decoration with a pig for a large paper clip
Even part of the face looks good on postcards:
Half of the face is made of paper and glued to the postcard
The outlines of the pig are completed with a black marker (author - SamfireGreetingCards)
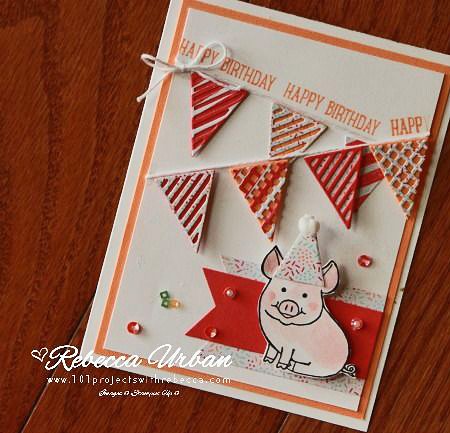
By the way, about painted piglets! They are very suitable for postcards:
There are ready-made sets for sale, so-called stamps. They can be color or black and white:
With their help you can make many different New Year cards:
If you can’t find ready-made stamps, you can draw the pigs yourself.
Fancy smth in his video he shows how to make 5 simple cards, including one with a PIGGY (see video from 6:40)
Don't want to draw at all? Then print out these painted pigs, color and cut them out:
Children will definitely love them, especially fans of cult cartoons and video games!
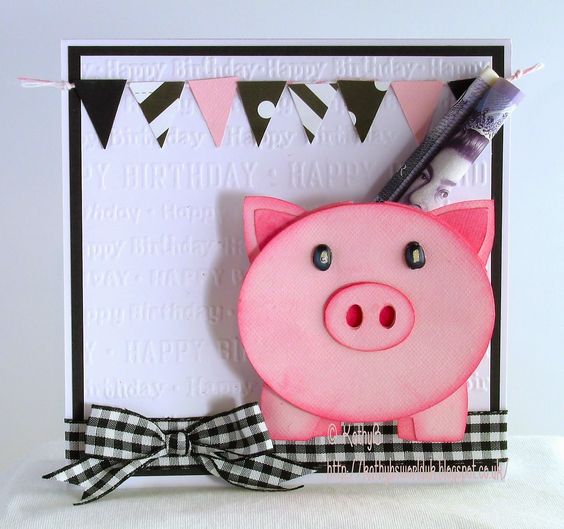
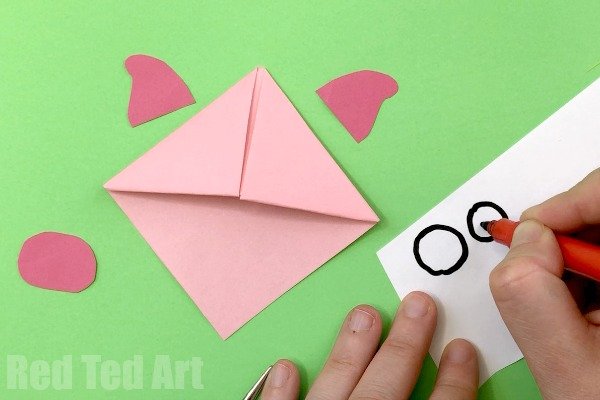
Having made the base, decorate it with a pig's snout:
This is also possible!)
A primitive family of piglets is also very simple to make:
Photo from www.redtedart.com
And these 3D pigs are easy to make, watch the video from the channel ChucAnh's Hobbies:
Let’s complicate the task and make a more realistic pig with our own hands using the Origami technique:
Channel Child's world makes a similar pig:
Do you want to surprise someone for the New Year? Make a piggy bank out of a banknote like this Julia Miers:
The most difficult to assemble is modular Origami. To assemble an Origami pig with your own hands, you will need 345 triangular blanks! If you are no longer new to this type of creativity, then you can probably handle it. To help - video from the channel papermagia.com.ua:
If we talk about pigs made of paper, then we must definitely mention the protruding pigs.
Openwork piglets cut out on paper will be very useful among lace trees, snowmen, bells and snowflakes.
You can cut out the silhouette of a pig on gift paper and wrap it as a New Year's present. You can cut it out of felt, make a backing underneath from contrasting fabric and sew a pillow.
Stitched pigs
A few illustrative examples of where to “place” a pig you made yourself:
We complicate the level a little and sew a patchwork Piggy with our own hands using this master class.
You can sew clothes for Piggy, so it will be more interesting for girls to play with it)
No less adorable piglets are sewn on Territories of Creativity Elma-toys:
More complex toys are ideal as interior dolls:
Workshop ElizaKittenShop sews a tilde pig:
Fairy's Gift Workshop sells Tilda style Christmas pigs:
If you want to sew them yourself, then a master class from Valentina Svetlova:
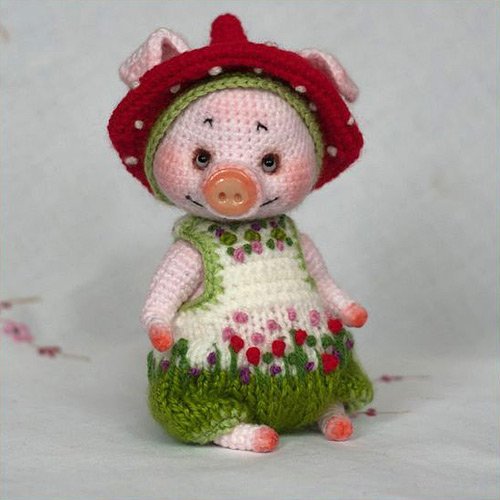
Every year there are more and more good master classes on knitting the symbol of the coming year, and the toys are more and more beautiful!
According to the master class "" this miracle fits in:
Zaikina Ksenia knitted this couple according to the above MK - take note of the clothing ideas!
Master Class)
Cross stitched piglets
Traditionally, we don’t ignore embroidery fans! You can embroider a small pig and decorate it, an apron or.
Look for more than 76 different patterns for embroidering cartoon piglets, as well as quite realistic ones, in a special album our VK group :
Author's embroidery patterns for piglets are more interesting; they can be purchased from girl designers. For example, at Maria Nechaeva The “Embroiderer” pattern is ready:
Three schemes with wonderful New Year's piglets have been developed Antonina Tretyakova :
Anna Petunova :
Ekaterina Nemshilova :
Scheme of the ball "Pigs":
It was once created by Vera Kondratieva, and now it is ready to be born again for everyone)
Cool pigs on wheels and rocking chairs for decoupage and painting can be purchased at the store “Everything for creativity (dljatvorchestva)”
Pigs can be used as an accessory for dolls, Teddy bears and their friends
Look for napkins for decoupage with images of pigs in handicraft stores in the city or in online stores. They are also available at the Masters Fair:
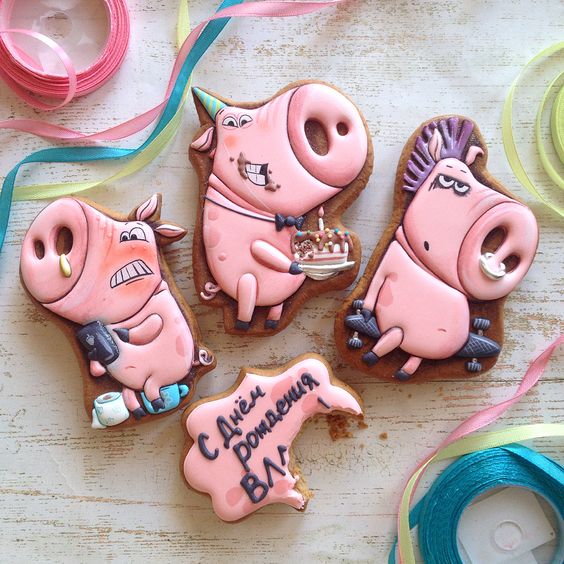
New Year's humor 2019
Let's end this article on a cheerful note and may the New Year 2019 be positive, joyful and inspiring!!!
And no one objects!
You won't get bored with these!
What a look!
We are all like that)
"Merry Christmas (Please Eat Chicken)"
The latest offer for New Year's Eve
A-ha-ha-ha-ha!!!


On New Year's Eve, you want to decorate your home, fill it with a special atmosphere, and also please the Mistress of the Year - the Yellow Pig. Making cute crafts following the instructions provided is easy and very fun. Children will be especially delighted if you take on such magical creativity together. Let's find out what crafts you can make for the New Year 2019 with your own hands - the symbol of the Year of the Pig.
Felt pigs
It’s very easy to make such a piglet, a symbol of the New Year 2019, with your own hands; for this you need to have the following arsenal of materials:
- Felt of different colors,
- Sintepon for stuffing toys,
- Sewing supplies,
- Scissors,
- Buttons,
- Beads.
It is necessary to cut out the parts from felt according to the proposed or your own pattern.

We sew the two parts of the head together, not forgetting to put the ears between them, using overlock stitches, leaving a hole for stuffing with padding polyester. After stuffing, we also sew up the hole using overlock stitches.
We also sew together two parts of the patch, stuff it with synthetic padding and sew two buttons to the patch.
Sew the finished patch and two beads for eyes to the head.
Sew the head to the body. The ponytail can be curled using a pencil. You can sew an elegant bow on the piglet’s neck.
If you attach a string to the pig's head, you can use the toy as a Christmas tree decoration.
Based on the proposed option, you can make many interesting options for toys, using additional materials for decoration (sequins, ribbons, beads) and your own imagination.


Sock pigs

This DIY symbol of the New Year 2019 is made from ordinary socks. Necessary materials:
- Two socks of different colors or with different bright prints,
- Buttons,
- Sintepon,
- Sewing supplies,
- Scissors,
We stuff one of the socks with padding polyester so that we get a spherical shape, and cut off the rest. We sew the edge of the sock, tighten it and sew it with a hidden seam.
We put the previously cut part of the sock on the resulting ball. We sew its edge, tighten it and also sew it with a hidden seam.
Cut off the upper part of the second sock and cut it crosswise into two halves. The blanks must be rounded, giving them the shape of ears. We sew each piece from the wrong side and turn it inside out. We sew the ears to the body with a hidden seam.
Sew on the buttons - the patch and the eyes.


Pompom pig
 The symbol of the New Year 2019 - the Pig - is made with your own hands from knitting threads. To do this you need to stock up:
- Threads made of wool or acrylic,
- Pink chenille wire
- Felt,
- Buttons,
- Cardboard.
You need to cut out two rings from cardboard, put them together and wrap them with yarn in several layers. Next, cut the yarn along the outer edge and tie in the middle between the rings with thread. Cut the rings and get a pompom.
We make legs and a tail from wire and glue it to the pompom. We cut out ears from felt. We use a button as a snout, buttons as eyes, or ready-made eyelets. Glue the parts to the pompom and get a cute pig.


Piglets from cones

Making such piglets will be easy even for children. You need to stock up on cones, plasticine and wire. The cone can be painted pink. We use large scales from cones as ears and glue them to the body. We make the nose, eyes and paws from plasticine, the tail from wire.
Polymer clay pig

We will need:
- Polymer clay,
- Tools for working with clay.
Roll out a ball of pink clay. Shape the muzzle. Supporting the head with your fingers, level the patch on a flat board.
Use a ball-end tool to shape the head and make the necessary indentations.
Use small black beads or black clay balls as eyes.
Make indentations - nostrils and mouth.
Connect the head and body with a wooden stick. Make and attach the piglet's arms and legs, as well as ears and tail, as shown in the picture.


